How to Use Google Antigravity IDE: AI Agents Build Apps
Summary
Learn to set up Google Antigravity IDE and use multi-agent AI workflows to build apps without heavy coding.

What is Google Antigravity?
Google Antigravity is a free AI-powered code editor (IDE) where AI agents write, test, and debug code for you. Think of it as having a team of AI developers working on your project at the same time.
Who is this for? Beginners, non-coders, and developers who want to ship faster.
What you'll learn: Install Antigravity, configure agents, and build a working app using plain English instructions.
Time needed: ~15 minutes
Prerequisites
- A personal Gmail account (Google Workspace accounts not supported yet)
- Windows, macOS, or Linux
- Chrome browser installed
Step 1: Download and Install
- Go to antigravity.google/download
- Select your OS (Mac .dmg / Windows .exe / Linux .deb)
- Run the installer
- Launch Antigravity
Step 2: Sign In and Initial Setup
- Sign in with your personal Gmail account
- Choose a theme (Dark/Light) — or import settings from VS Code or Cursor
- Configure two key settings:
| Setting | Option | What It Does |
|---|---|---|
| Terminal Permissions | "Request Review" | Agent asks before running commands |
| Artifact Review Policy | "Pause on Major Changes" | Agent pauses before big file edits |
Recommended for beginners: Keep both on "Request Review" so you stay in control.
Step 3: Understand the Two Views
Antigravity has two main interfaces:
Editor View
Your standard code editor. Write code, get autocomplete suggestions, and chat with AI in the sidebar.
Manager View (Mission Control)
This is where the magic happens. You type a task in plain English, and Antigravity assigns AI agents to complete it.
How to switch: Click the toggle icon in the top-right corner of the window.
Step 4: Run Your First Mission
- Open Manager View
- Click "New Mission"
- Type your task in plain English
Example Input:
Build a landing page with a hero section, feature cards,
and a contact form. Use HTML, CSS, and JavaScript.- Click "Run"
- Watch the agents work in real time
Example Output: Antigravity creates 3 files:
index.html    — Page structure with hero, cards, contact form
styles.css    — Responsive styling
script.js     — Form validation logic
Each agent shows its progress as visual artifacts (plans, code diffs, screenshots).
Step 5: Review and Approve Changes
Agents pause at checkpoints and show you:
- Task Plan — What the agent intends to do
- Code Diffs — What lines will change
- Browser Screenshots — How the result looks
Click "Approve" to continue or "Edit" to give corrections.
Example correction:
Change the hero background color to dark blue (#1a1a2e)
and make the CTA button larger.
The agent updates only what you asked — no full rebuild.
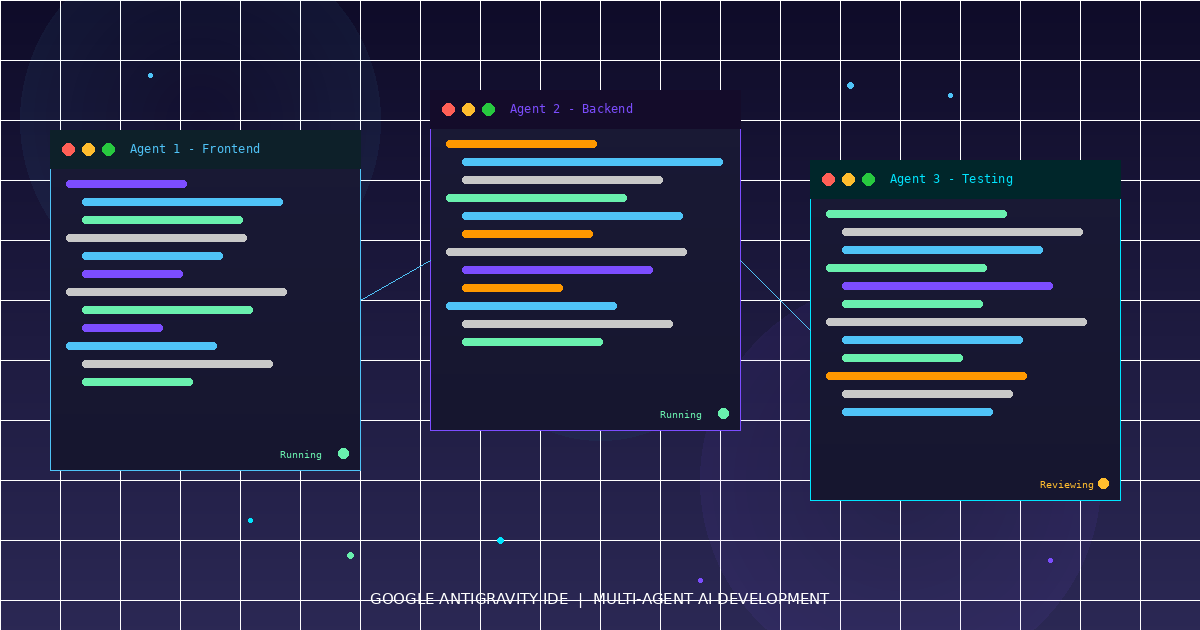
Step 6: Use Multiple Agents in Parallel
This is Antigravity's biggest advantage. You can run up to 5 agents simultaneously.
Example Mission:
Agent 1: Build user authentication with Google OAuth
Agent 2: Write unit tests for the auth module
Agent 3: Create a dashboard page with charts
Agent 4: Set up a SQLite database for user profiles
Agent 5: Write API documentation in Markdown
Each agent works independently and reports back when done.
Step 7: Choose Your AI Model
Antigravity supports multiple AI models. Assign different models to different agents based on the task.
| Model | Best For |
|---|---|
| Gemini 3.1 Pro | General coding, planning |
| Gemini 3 Flash | Quick edits, fast iteration |
| Claude Sonnet 4.6 | Nuanced logic, debugging |
| Claude Opus 4.6 | Complex architecture |
How to change: Click the model name next to any agent in Manager View and select from the dropdown.
Step 8: Test with the Built-In Browser
Antigravity has a built-in Chrome-based browser. Agents automatically:
- Launch your app in the browser
- Take screenshots of the result
- Report visual bugs they find
You don't need to manually open a browser to test.
Pricing Quick Reference
| Plan | Cost | Requests/Day |
|---|---|---|
| Free | $0 | ~20 |
| Pro | $20/month | Higher limits |
| Ultra | $249.99/month | Maximum access |
The free tier is enough to try everything in this guide.
Common Mistakes to Avoid
- Vague missions — "Make a website" is too broad. Be specific about pages, features, and tech stack.
- Skipping reviews — Always check agent output before approving. Agents are good but not perfect.
- Too many agents on small tasks — One agent is fine for a single-page component. Use multiple agents for multi-feature projects.
Quick Recap
| Step | Action |
|---|---|
| 1 | Download from antigravity.google/download |
| 2 | Sign in with personal Gmail, configure review settings |
| 3 | Learn Editor View (code) vs Manager View (agents) |
| 4 | Type a mission in plain English and hit Run |
| 5 | Review agent output at each checkpoint |
| 6 | Run up to 5 agents in parallel for bigger projects |
| 7 | Pick the right AI model per task |
| 8 | Use the built-in browser for testing |
Next Steps
- Try building a todo app with authentication as your first real project
- Explore AgentKit 2.0's 16 specialized agents for frontend, backend, and testing
- Connect your GitHub repo directly to push code from Antigravity
Comments
Be the first to comment
Found this useful?
Get new AI guides for builders by email. Free.
Join 2,042 builders reading daily.